Oh my, this has been sitting in my drafts folder for-e-ver! I haven’t posted in a while so now is as good a time as any to share! As promised in a previous blog post and without further ado here are the details for Margaret’s 1st birthday. Hopefully you enjoy the pictures and maybe take something away for future kiddo’s birthday parties 🙂
** Warning, this post contains A LOT of photos. Why? Because it’s her birthday, she’s adorable, and I worked my butt off on it 🙂
I was kind of on the fence about going ‘all out’ with a party for her. I mean, she’s 1, she wouldn’t remember it at all. Well, as more and more moms in my moms group were posting their ideas, themes, and cute crafts, I decided I definitely wanted to do something for her. Who doesn’t love time to celebrate with family anyways?! Our place is way to small to host a party so my in-laws hosted, such a gorgeous (spacious) home!
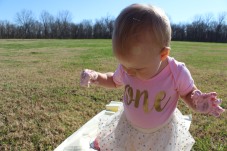
When think about a theme the 1st thing that came to mind was that I wanted her to be able to wear this cream skirt with gold polka dots. I like to pair it with a cute pink and gold shirt she has so I thought getting a “one” onesie would be perfect! There was the ‘theme’ pink, cream, and gold. It’s not like she’s got anything in particular that she loves to use for a theme…unless I had done a food themed party (she l o v e s food!)… we did have a ton of food anyways.
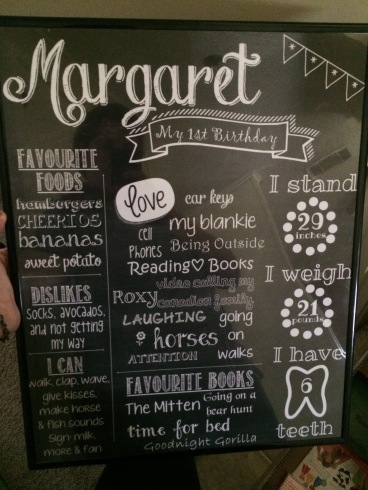 I wanted to have a birthday chalkboard, but my writing is not pretty! Luckily someone in my moms group posted a link to a blog that walks you through doing your own online by downloading this program (I’ll search for the link and attach it when I find it). Be warned. If you use this website, once you save your chalkboard you can add to it, but you can not make changes to it. SO frustrating for me because my computer kept freezing and shutting down. I finally got it, and was very happy with the results. I printed it at Walgreens, it was the cheapest I found, and I googled coupons and got an addition % off! I definitely recommend googling coupons for everything you plan to purchase on line. I got a cheap frame from Hobby Lobby and that was that. 1 thing down!
I wanted to have a banner hanging saying “Happy Birthday”, and in an effort to save money (seriously party planning sucks up money f a s t!) and because I wanted it to be really sparkly I decided to make my own. I drew up a template for my triangles, and then cut out the desired amount in light pink & dark pink. I had some alphabet stencils I had bought last year so I used them to trace on the letters (leaving room for the top to fold over the string). I then ordered a big ol’ jar of gold glitter off handy dandy amazon and a friend and I used modge podge to stick it to the letters. FYI if you go this route put the glue on generously, it stays wet longer and the glitter looks much better. Once you cover the glue in the glitter gently use your finger to pat it down to make sure it’s stinking (but not too hard). I was SO happy with the result. Be warned this is messy. make sure you do it over something that can contain the inevitable glitter mess.
I decided to make cupcakes instead of a cake for all the guests and we were expecting 22 so it was perfect! I used Duncan Hines vanilla mix because my mom swears it is superior to Betty Crocker, sorry Betty, Mom knows her baking! I made icing and divided it into three bowls before colouring. The cream was good because the vanilla made it ever so slightly off white, the light pink was a couple drops of red food colouring, and the dark pink was a number of red and 1-2 drops of blue food colouring. I used some pink cups (but they didn’t look too pink afterwards), and gold foil ones (loved these!) I then sprinkled them with some sprinkles, glittery sprinkles, and tiny balls. Once again, so happy with how these came out. Now I know how my mom feels staying up until 2am doing cupcakes… and I was only doing 24 simple ones!
PS: check out her work here. It’s uh-may-zing!


I also wanted to do something to decorate her highchair so I made a ‘skirt’ to go around her tray. I used tissue paper, as well as some gold ’tissue paper’ from Party City (it was not tissue, but it looked good!) I cut the paper into 3 sections and then folded those in 1/2 length wise. I then cut strips about 1/2″ wide all the way up, leaving about 1-2″ before hitting where the fold was at the top. I would then unfold the paper and lay it flat. I had originally been rolling it up like a rug with the dangly ends on the outsides but it wasn’t working to well. So I folded/scrunched it up in the middle. Then I twisted it in the centre and folded the twisted part in 1/2 to make a loop (where the string could go through to hang it). I used a thin piece of tape to keep the loop in place. When I was done I strung them all up, and tapped it to the highchair once we were at the party. It was really time consuming cutting all the fringe parts of each tassel, but it’s mindless work and I got to choose my colours, so it was worth it.


I had wanted to hang a garland up in the kitchen with her monthly photos. I even had cute little tiny pink clothes pins to do it .. but time was not my friend. So, I just stuck them to the windows behind her chair so people could look at them. I was not a huge fan of displaying them this way, but it worked. It’s so hard to believe she was so teeny once!


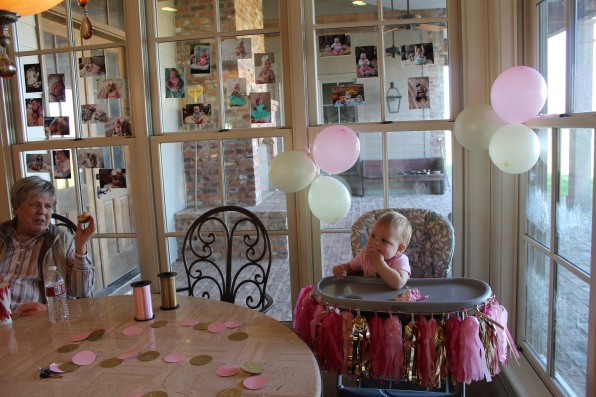
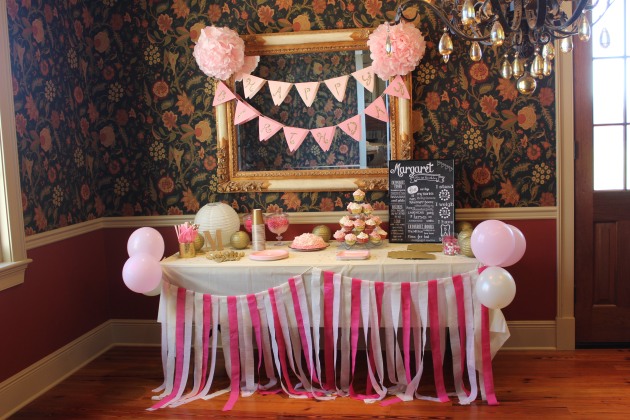
I decorated the rest of the table with streamers, and placed the lanterns & puffs I bought around the table and beside the banner. I sprinkled some gold confetti on the table, and set out the cups, plates, cutlery, and straws. I ha two plastic clear jars that I put candy and tissue paper in, and 2 gold ones that I filled with more chocolates. The little wooden “M” was the last touch. (My house was SO pink, and cluttered with party decorations, for a couple weeks)


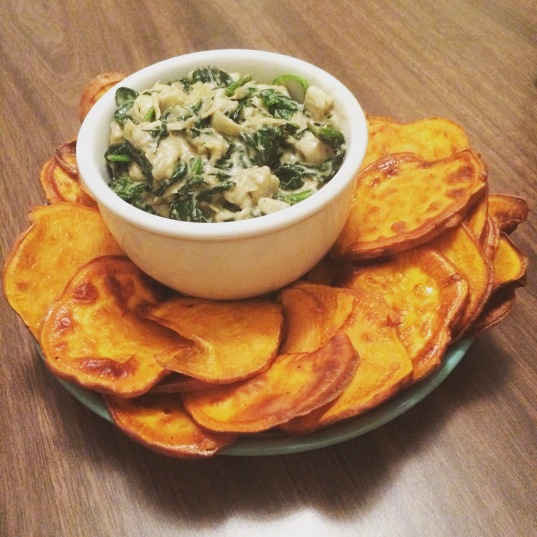
Obviously we had lots of sweets on the ‘fancy table’. But on the kitchen island we also had dip, chips, veggie and fruit trays. I had been planning on not having a meal (hello huge expense) but my husband ended up having to work that afternoon so we moved the party up to noon. We bought medium sized soft tortilla’s, alfredo sauce, red sauce & BBQ sauce, as well as all the other pizza toppings; and people made their own personalized pizzas. It was a big hit, filling, and easy (just have somebody who’s keeping track of the oven so nobody gets a burnt pizza). I would definitely recommend it for a birthday party for a child of any age!
We didn’t do a ‘cake smash’ photo shoot because, well, photographers charge a ton, and I didn’t see the necessity. I just made her a cake to ‘smash’ at the party and then eat afterwards, since she couldn’t have the cupcakes – thanks allergies! I put a table cloth on the grass so she wouldn’t mind sitting outside, we sang “Happy Birthday” inside and then we all came out to watch her ‘smash it up’; which she did not. Haha. She did enjoy squishing the icing in her hands though. Everybody loved getting to watch her, and I took a bunch of pictures. Moment recorded, for free – booya!
We brought her inside to her highchair to eat her own slice of cake. I guess she really started enjoying the icing because she went ham on that thing!


Because her birthday is so close to Christmas she really didn’t need anything so we asked our guests not to bring gifts. However we knew most of them would still get something, so we asked that if they really wanted to get anything money towards her big girl car seat (those things are not cheap!) would be great. So that’s what people did and we only ended up with a few physical presents. This was definitely the best idea because we were able to get her a nice one –Graco4ever – that will last her until she doesn’t even need a booster anymore, without having to worry about the months bills. Definitely something I would recommend for anybody who’s baby does NOT need more stuff.
So that was it, You might as well have been there after all that detail, eh? Happy planning party people!
– Emily
PS: I am going to be selling the party things online
so if you know anybody looking for supplies for a
pink/gold/cream party point them my way!/ comment below! 🙂


 Poor girl. the good news is that if they’re not super severe she will likely outgrow them by the time she’s 4-5 years old. We will go in to a lab to get blood drawn for more detailed results, and to see which proteins she’s allergic to (that’s my understanding of it anyways). Hopefully this will tell us that she can have eggs in things that are baked, that would make things a bit easier. In the mean time they gave us an epi pen. We now have a confirmation of our suspicions, which is nice, and we can make sure she’s got food that is safe for her. Time to revamp the menu, it actually works out well that we’re doing paleo right now.